28 September 2012

Duo - Colour Nails

My cousin came over and asked if I could do her nails, she wanted them to be two colours and bold. So that's what I did! 

Equipment:
- Base coat
- 3 different coloured nail polishes (I used green, yellow and
  burgundy).
- Black striper pen (optional)
- Topcoat


Step 1:

Prep your nails using your favourite base coat and then using your first nail polish (in my case I used green) paint two coats.


base coat green nail art duo-colour nail art two colour nail art using black striper pen


Step 2:

Take your second colour and paint half of the nail with a curve shape. I used this same colour on every other nail and chose a different colour for the rest of them. You could have the same colour on each nail or different colours on every nail - it's up to you! If you have longer nails you may want to use 3 different colours on each one, just make each section slightly smaller.


two colour nail art design green yellow red curved

Step 3:

This step is optional, my cousin chose not to have it, however to add a little bit more detail you can use your black striper and follow the curve to separate out the two colours.

Step 4:

To complete your design add a coat of your favourite topcoat to help set the nail polish.


duo-colour nail art green yellow red curved simple nail art for beginners and short nails


Thank you for taking the time to read this, I hope you give it a go! Any questions you have I will be happy to answer :) 


11 September 2012

Sausage Dog Nail Art

I found a picture the other day and someone had painted their nails as a sausage dog! I loved the idea so I had to have a go myself :) Here's how I did it:

Equipment:
- Green nail polish (or any other colour to use as a base colour)
- Brown nail polish
- White nail polish
- Black nail polish
- Nail art brush
- Dotting tool
- Topcoat
- Basecoat

Step 1 - The Base Colour:

Using your basecoat, prepare the nail. When that is dry paint 2 coats of a base colour of your choice. I used Barry M - mint green.

Mint green barry M nail polish cute sausage dog nail art


Step 2 - The Body:

Take your brown nail polish and on your middle and ring finger paint a rectangle across your nail (you want to try and get them the same size if you can).

Then on your index finger paint another rectangle the same size as before and add a small, curved line near the tip of your nail to make the front legs of the sausage dog.

On your thumb you are going to paint the head. At the tip of your nail paint an oval shape that extends out on one side (the picture below should make this clearer for you).

Finally on you little finger use your dotting tool to create a small circle. Then use your nail art brush to draw one curved line going towards the cuticle (this is going to be the tail) and one curved line going towards the tip of the nail (this will be the back legs of the dog).

sausage dog body nail art cute bones using barry m mushroom a dotting tool and nail art brush

Step 3 - Finishing Touches:

Using you black nail polish and a small dotting tool, add an eye to the dog. 

Then take your white nail polish and nail art brush and create small bones around the body of the sausage dog. 

Finally finish your design with a topcoat of your choice.

sausage dog body nail art cute bones using barry m mushroom a dotting tool and nail art brush


Thank you for reading this, I hope it was clear to you and you are able to give this really cute sausage dog a go. If you have any questions, feel free to ask :) 


23 August 2012

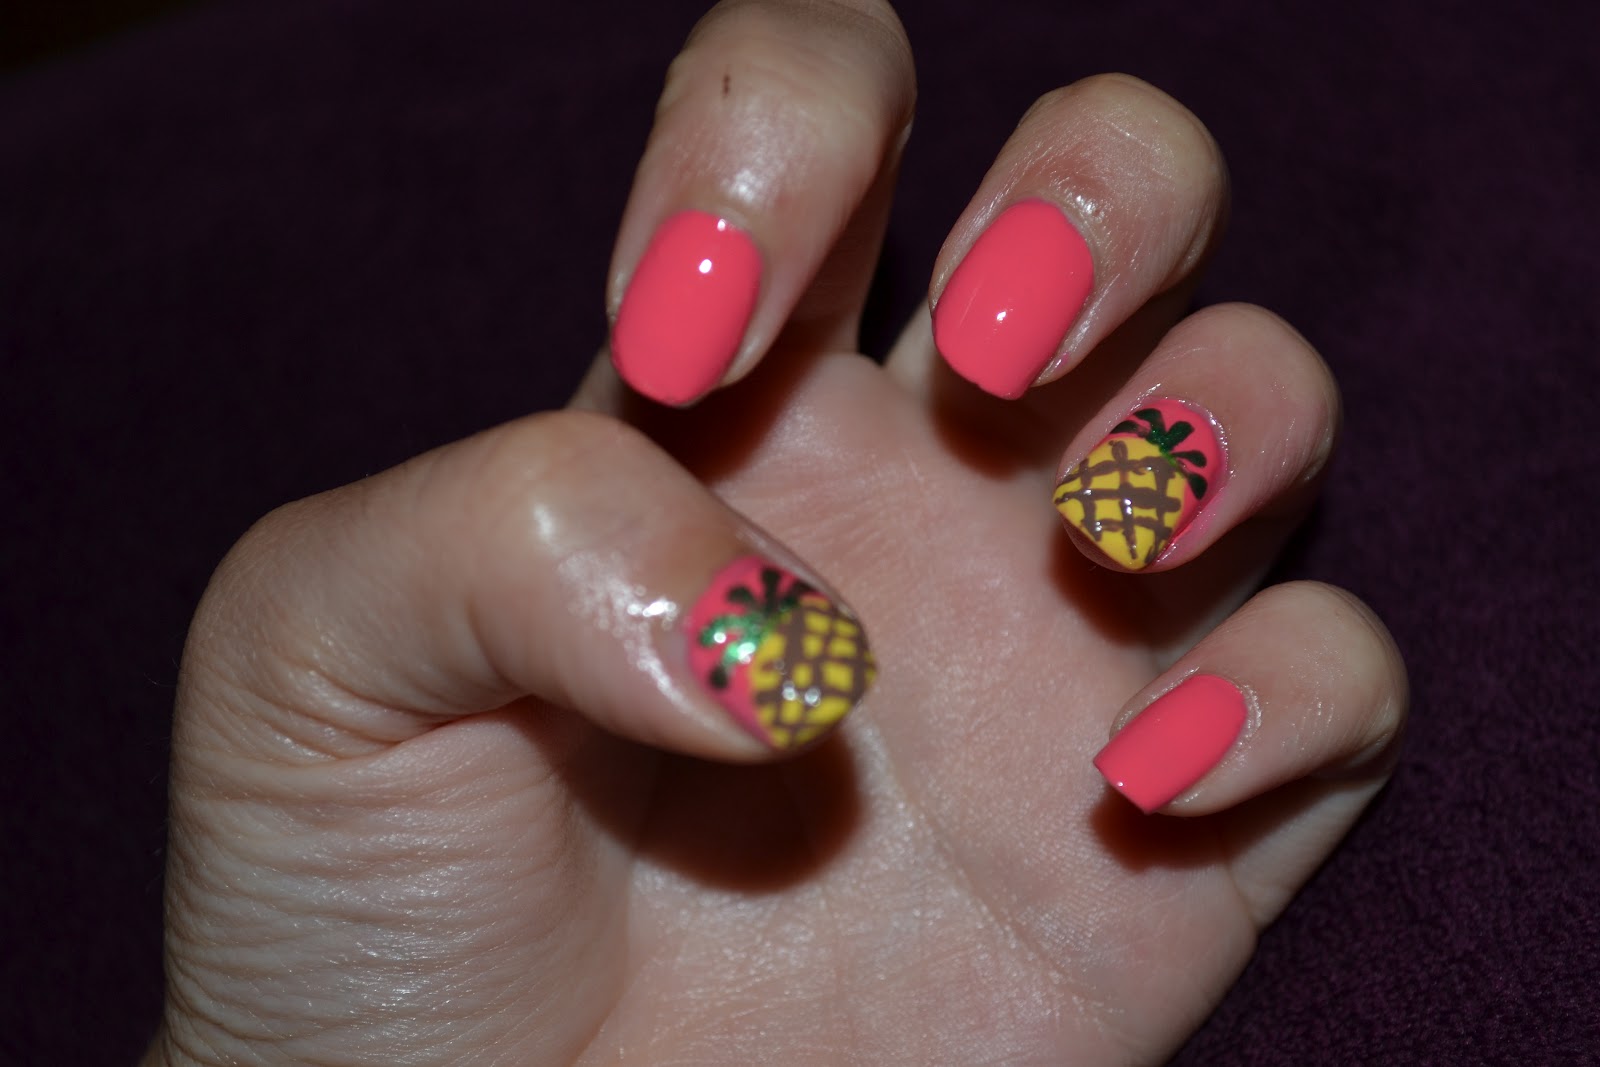
Pineapple Nails

Pineapple Nails

We've been having some nice weather recently and for some reason it made me think of pineapples! So i decided to do some pineapple nail art :) Here's how i did it:

Equipment I used:

- Barry M basecoat/topcoat/nail hardener (no. 54)
- Barry M Pink Flamingo (no. 305)
- Barry M Lemon Ice Cream (no. 307)
- Barry M Emerald Green (no. 284)
- Barry M Mushroom (no. 310)
- Thin nail art brushes


Step 1:

Apply a basecoat and when dry use two coats of your Barry M Pink Flamingo for the base colour.


Barry M Pink Flamingo base coat


Step 2:

Using the normal brush in the polish, create an oval shape near the tip of your nail using Barry M Lemon Ice Cream. This will form the body of the pineapple. I just did this on my thumbs and ring fingers, however you can do it on as many nails as you like! 


Barry M Lemon Ice Cream Nail Varnish Pineapple Body Summer


Step 3:

Take your thin nail art brush or a cocktail stick and your Barry M Emerald Green polish and draw a straight line from the top of the pineapple to form the middle leaf. Then draw curved lines around the top of the pineapple for the rest of the leaves.

Barry M Emerald Green nail polish, Pineapple, Leaves, Nail art, Brush, Pink nails


Step 4:

Using a different nail art brush and your Barry M Mushroom polish create a criss-cross pattern on the body of the pineapple.


Pineapple, Barry M, Mushroom polish, Criss-cross nail art, Leaves, Pink nail art, Summer nail art, nail art


Step 5:

To finish this summery look add a topcoat, this will help your design last for longer as well as adding a bit of a shine to your nails! :D


Thank you for reading my blog, I hope you give this look a go! If you have any questions just ask below! 


7 August 2012

Olympic Nail Art

Olympic Inspired Nails

As you all know, the Olympics have finally come to London! I managed to get tickets to see the volleyball at Earls Court so I decided I would paint my nails with an Olympic theme to match the occasion. I saw a picture on Google and decided to try it out. Here's how I did it:

Equipment:
- Navy blue nail polish
- White nail polish
- Red nail polish
- Black nail polish
- Green nail polish
- Yellow nail polish
- Thin nail art brush

Step 1:

Using you favourite base coat paint on one or two coats. When that is dry paint both you thumb and ring finger with two coats of white nail polish (I used Barry M) and paint the other three fingers with a dark/navy blue polish:

Olympic nails, nail art, union jack nail art, Olympic ring nail art, Jemma sherman nail art

Step 2

On your thumb use your nail art brush to draw the Olympic rings (the order is blue then black then red on the top and then yellow then green underneath). To get the paint on your brush you can either dip the brush into the pot or you can put a blob of nail varnish on a piece of scrap paper and then dip the brush in the blobs. Underneath the rings, use your nail art brush and black nail polish to write 2012.

Olympic nails, nail art, union jack nail art, Olympic ring nail art, Jemma sherman nail art

Step 3:

For the union jacks use either a white striper or your nail art brush to draw a cross in the middle of your nail with an X on top. You will need to make these lines quite thick in order to be able go over the top of with a thin line of red polish to finish off the union jacks.

Step 4:

Lastly for the ring finger simply take you nail art brush and draw 5 lines in the order blue, black, red, yellow and green (this represents the colours of the Olympic rings). To finish go over every nail with your favourite topcoat which will help to make your design last for longer :)

Olympic nails, nail art, union jack nail art, Olympic ring nail art, Jemma sherman nail art

NOTE:

If you are from a different country, you could try and replace the union jacks with your own flag or you could replace them with something else for example a medal. To do this you would need to paint your nail with a pale colour (I would use white) and then using a dotting tool make a dot of bronze, silver or gold nail varnish at the tip of you nail. Then use a striper or nail art brush and red nail varnish to make the straps of the medal.


I hope you give this Olympic design a go and have fun experimenting with the designs that you use e.g. you could have all union jacks or all Olympic rings. Thank you for taking the time to read this, please share it with your friends so they too can give this design a go!

6 August 2012

Pacman Nails

Pacman Nails

To create this stylish Pacman look, you will need: 

- A red nail varnish
- A pink nail varnish
- A blue nail varnish
- An orange nail varnish 
- A yellow nail varnish 
- A white nail varnish
- A black striper pen
- A base coat
- A top coat
- A dotting tool 

Step 1

Apply a coat of your favourite base coat and when that is dry, apply two coats of red nail varnish on your little finger, pink nail varnish on your ring finger, blue nail varnish on your middle finger, orange nail varnish on your index finger and yellow nail varnish on your thumb.

Step 2

At the tip of each finger (not the thumbs) draw two triangle shapes using your black striper. If you don't have a striper you can use something similar e.g. a thin paintbrush or a cocktail stick dipped into black nail varnish:

Pacman nails, blue nail art, pink nail art, orange nail art, red nail art, yellow nail art

Step 3

At the tip of the thumb draw and fill in one triangle using your black striper. Then draw a curved line near the cuticle and fill that in too. You should end up with the outline of Pacman:

Pacman, ghosts, dotting tool, nail art, using a striper

Step 4

Using your dotting tool and white nail varnish, make two dots on each nail (except the thumb) to form eyes. On the thumb use black nail varnish and do a small dot for the eye:

Eyes, pacman, ghosts, dotting tools, nail art

Step 5

Using a smaller dotting tool, dip it into black nail varnish and make a small dot in every white dot to form the middle of the ghost's eyes:

Pacman, ghosts, nail art, dotting tool, eyes

Step 6

To complete this look, paint on one coat of your favourite topcoat to help the polish stay for longer.


I hope you enjoy trying this fun look out and share it with your friends! If you have any questions comment down below and I will answer them as best as I can. Thank you :) 


23 June 2012

Zigzag nail art

Zigzag Nails


For me, nail art is a way of expressing myself. The good thing about it is that it doesn't just have to be for the professionals, anyone can create beautiful nail art designs as long as you just put your mind to it. If you have a few items (often just a nail polish and a dotting tool) the world of nail art is your oyster! Over the past few years I have become more and more interested in nail art, playing around with colours, designs and tools. I thought it was about time that i shared a few of my creations you - starting with my zigzag nails.


Green and black zigzag print nail art


To get this look i used:
- P2 colour victim nail polish in shade 620 Artful
- Rimmel London 60 seconds in shade 800 Black out
- Thin nail art brush
- Piece of scrap paper


Step 1


P2 colour victim nail polish - green

First apply a base coat to protect your nail. When that is dry add two coats of your favourite nail polish, I used P2 colour victim which was a lovely shade of green. 


Step 2


Zigzag line

Put a blob of dark nail polish onto a piece of paper (I used Rimmel London 60 seconds black out). Dip either a thin nail art brush or a cocktail stick into the dark polish and draw a zigzag line in the middle of your nail.


Step 3


Working your way towards the edges of your nails, continue to draw zigzag lines until the nail is covered. Then to finish the look, add a coat of your favourite top coat to protect your artwork!


Green and black zigzag nail art

Green and black zigzag nail art


I hope you have fun trying this look out. Why not mix up the colours to create your own individual zigzag nail art?